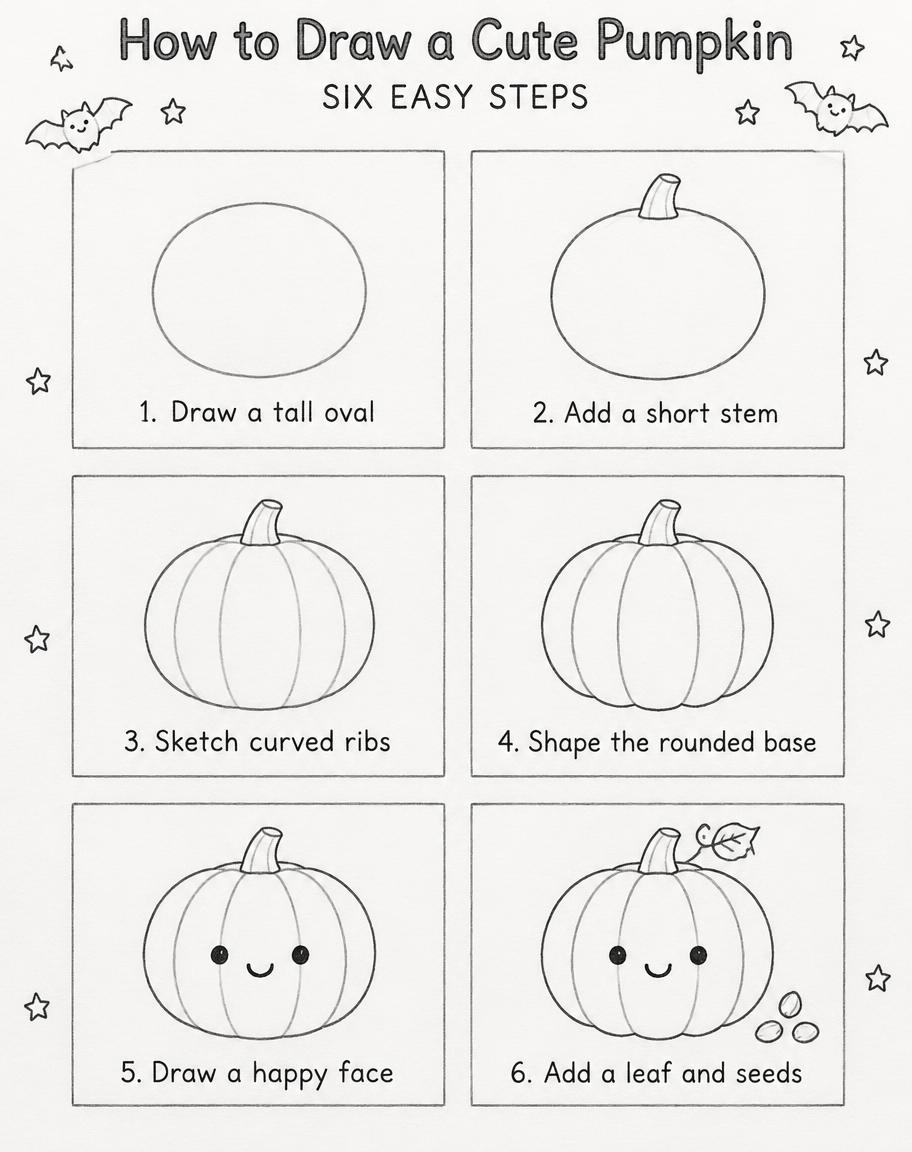
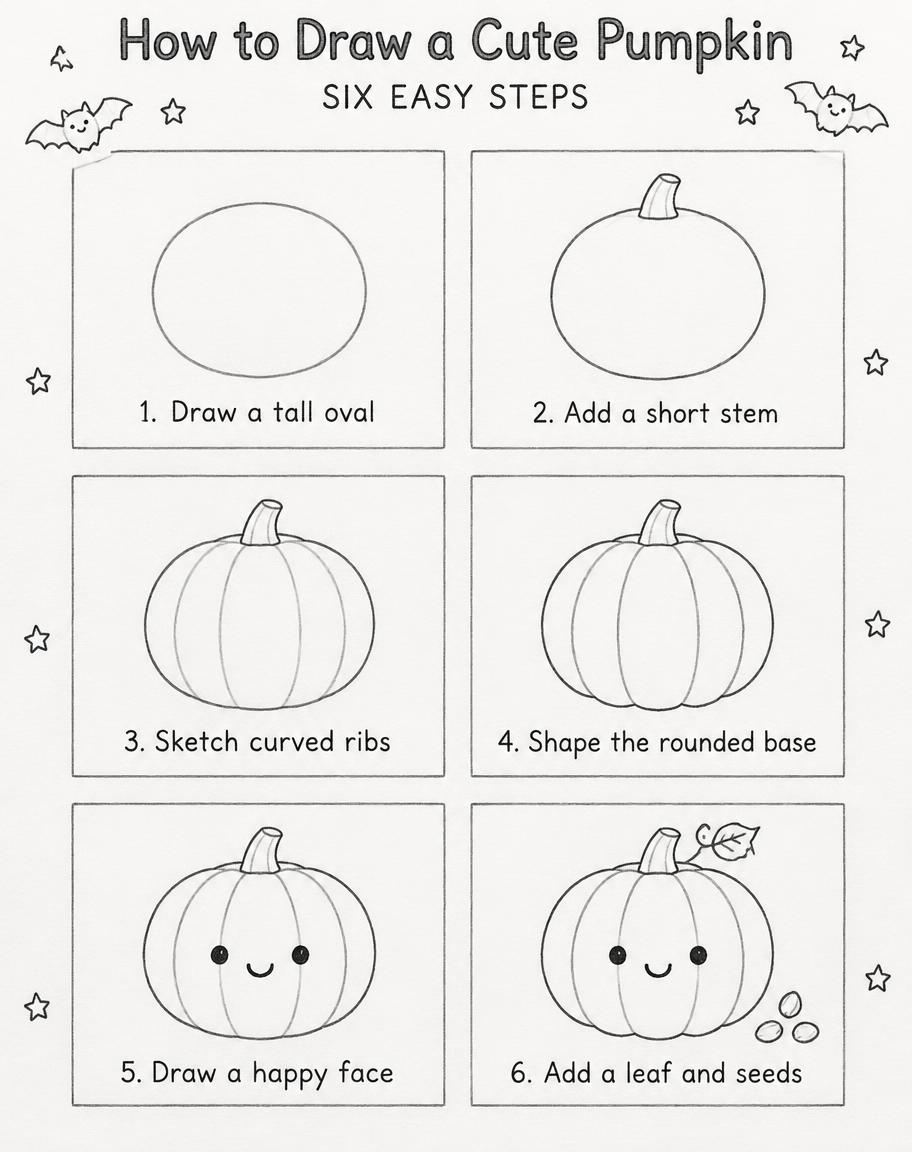
How to Draw a Cute Pumpkin SIX EASY STEPS 1. Draw a tall oval 2. Add a short stem 3. Sketch curved ribs 4. Shape the rounded base 5. Draw a happy face 6. Add a leaf and seeds - Halloween Fofo Text Effect

Usa OpenAI GPT-Image-2.5 Sunburst, o modelo desta obra · 15 créditos


"How to Draw a Cute Pumpkin" é uma folha-guia de desenho passo a passo com o subtítulo "SIX EASY STEPS", feita em linhas suaves de lápis cinza. Seis quadros mostram uma abóbora que passa de um oval simples a uma abóbora com gomos, caule, rosto sorridente, folha e sementes. Troque o título, as legendas dos passos ou o tema para criar uma folha de desenho de outro personagem ou objeto.
Create a finished 4:5 portrait how-to-draw guide on clean white paper, using only plain black pencil lines and a very faint paper grain. Title at the top, exactly: “How to Draw a Cute Pumpkin”. Set it in friendly, wide rounded display lettering with even-weight strokes, open counters, generous spacing, and softly rounded terminals; draw the letters as simple black pencil outlines and marks, with no glossy finish or color. Beneath it, a small centered label reads exactly: “SIX EASY STEPS”. Below the heading, arrange exactly six clearly separated numbered instructional panels in a neat two-column by three-row grid, read left to right, then top to bottom. Give each panel a fine, simple pencil-line frame, ample white interior, and one clear pumpkin drawing stage. In each panel, place the drawing above its short caption; keep all numbers and captions crisp, correctly spelled, and easy to read. Show one consistent cute, squat, round pumpkin in every stage, with smooth chubby proportions and a simple cheerful face only when the sequence reaches that step: 1. “1. Draw a tall oval” — one light oval construction outline. 2. “2. Add a short stem” — same oval with a small stem at the top. 3. “3. Sketch curved ribs” — stem and several curved vertical rib guides. 4. “4. Shape the rounded base” — refine the scalloped lower edge into a pumpkin silhouette. 5. “5. Draw a happy face” — add small dot eyes and a gentle smiling mouth. 6. “6. Add a leaf and seeds” — finish with a small leaf by the stem and a few seed marks. Keep the drawing stages progressive and consistent, like a child-friendly pencil tutorial. Use clean black pencil contours, a few light construction marks where helpful, and no filled areas, colored accents, gray wash, or dramatic shading. Add only a few tiny black-pencil Halloween stars and friendly bat doodles around the outer margins, never inside the panels or behind the text. Soft, even light; no cast shadows. Preserve generous spacing so the six steps are immediately distinguishable.
Tags
Gerada em 19 de outubro de 2026 · 912 × 1152 · JPEG · OpenAI GPT-Image-2.5 Sunburst · Layout: Six-Step Grid · Compartilhada pelo criador · Uso comercial gratuito (CC BY 4.0)